I was literally just cleaning out my closet this past weekend. I found this massive pile of clothes pushed all the way to the back. Some of them still had the tags on! I sat on my bedroom floor and just stared at them, feeling this huge wave of guilt. I had spent so much hard-earned money on pieces that either fell apart after one wash, fit me terribly, or were just made of the weirdest, scratchiest materials ever. It is so frustrating.
We have all been there. You are walking through a store or scrolling online, and a piece looks so amazing on the hanger or on the model. You buy it on an impulse. Then you take it home, and it is just a complete disaster. Honestly, the modern fashion industry makes it so easy to buy bad clothes. But over the last year, I have completely changed my shopping habits. I had to, for my own sanity and my wallet.
I put together this full, unfiltered guide for you guys. Because I want us all to build wardrobes that actually last. Here is my exact process for evaluating clothes before I even think about walking up to the cash register. Let’s get right into it!
1. The Infamous “Scrunch Test”
Okay, this is the very first thing I do when I walk into a store. If a shirt or a dress catches my eye, I do not just look at it. I grab a handful of the fabric and I squeeze it as hard as I can in my fist for about ten seconds. Then I let go.
Why do I do this? Because it tells you exactly how the garment is going to behave when you actually live your life in it. If you let go of the fabric and it looks like a crumpled up paper bag, put it back on the rack immediately. I am dead serious. If it wrinkles that badly just from your hand, imagine what it will look like after you sit in a car for twenty minutes.
I learned this lesson the absolute hardest way possible. Last summer, I bought this gorgeous, flowy, light blue midi dress. It looked so elegant in the store. I wore it to a big outdoor family gathering. I drove about forty minutes to get there. When I stepped out of my car, the entire back of the dress and the lap area were completely covered in deep, aggressive wrinkles. I looked like I had slept in it for three days. I spent the whole afternoon trying to pull the fabric straight. It totally ruined my confidence that day.
You want clothes that work for you, not clothes that require you to carry a handheld steamer everywhere you go.
Your fabric checklist:
- Squeeze it: Give it the ten-second fist test. If it bounces back smooth, it is a winner.
- Read the label: Look for natural fibers blended with a tiny bit of synthetics for stretch. 100% cheap polyester is usually a bad idea.
- Feel the drape: Hold it by the shoulders. Does it hang nicely, or does it look stiff and weird?
2. Flipping It Inside Out (The Real Story)
You can tell everything you need to know about a brand by looking at the inside of their clothes. A fast-fashion brand will make the outside look shiny and perfect, but they will completely cut corners on the inside to save money.
Whenever I am in a fitting room, I literally turn the garment completely inside out. I check the seams. Are they straight? Are there random loose threads hanging everywhere? If you gently pull on the fabric near the seam, does the stitching look like it is going to pop open? If the seams are messy, uneven, or look fragile, the garment is not going to survive your washing machine.
Growing up, my grandma used to make the most incredible traditional beadwork and heavy canvas jackets for our family. As a Native woman, she taught me that the energy and care you put into making something is just as important as how it looks on the outside. She would always say, “If the inside is a mess, the outside is just lying to you.” She was so right. A well-made piece of clothing will have bound seams, tight stitching, and finished edges. It shows that the maker actually respected the garment.
3. The Bright Light Test (Checking for Opacity)
This is a major one, especially for spring and summer clothes. Brands are making fabrics thinner and thinner these days to save on production costs. It drives me insane. You buy a nice white t-shirt, and you think you are good to go. Then you step outside and everyone can see your bra, your belly button, and your deepest secrets.
Before you buy anything light-colored, hold a single layer of the fabric up to a bright light. You can use the fluorescent lights in the store ceiling or a nearby window. Put your hand behind the fabric. Can you see the exact outline of your fingers? Can you see your skin tone clearly through the material? If the answer is yes, the fabric is way too thin.
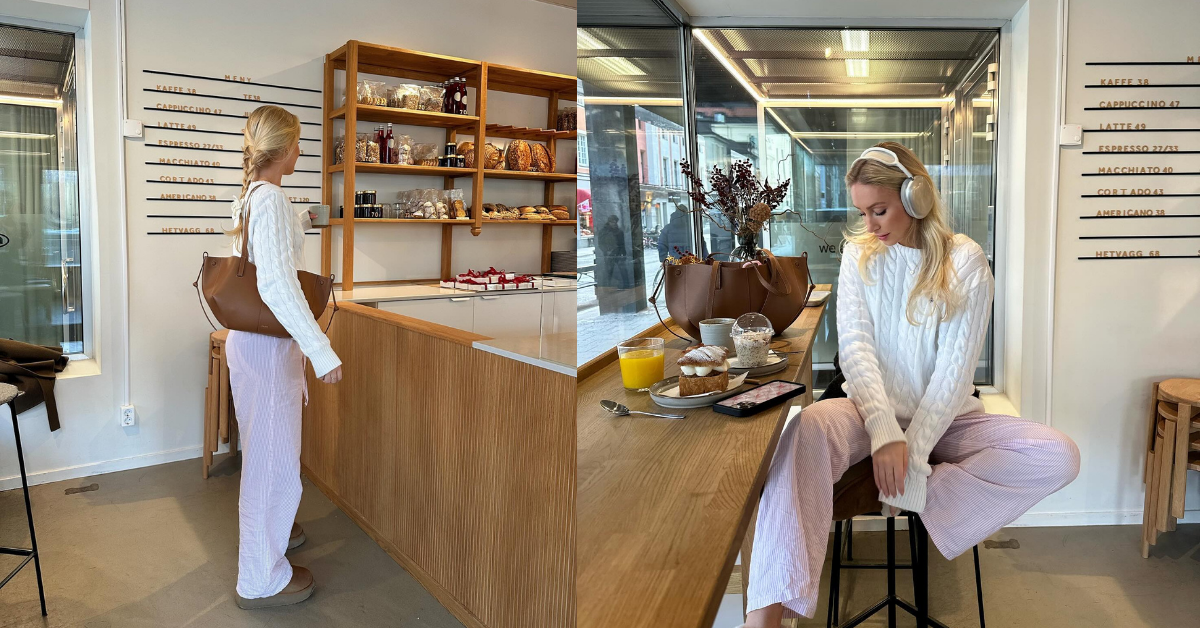
I bought this beautiful, thick-looking cream turtleneck sweater a few winters ago. In my dark bedroom, it looked totally fine. But I wore it to a coffee shop that had massive floor-to-ceiling windows. The sun was shining right on me. My best friend leaned over across the table and whispered, “Babe, I can literally see the lace pattern on your bra.” I was mortified! I had to sit with my jacket zipped up to my chin for the rest of the day.
How to avoid the sheer trap:
- Hold it to the light: Always check the opacity before buying.
- Look for linings: A good quality dress or skirt will almost always have a built-in slip or lining.
- Check the weight: Heavier cottons and knits just fall better on the body and hide undergarments properly.
4. Hardware is the Dead Giveaway
Okay, let’s talk about the hardware. I am talking about zippers, buttons, clasps, and drawstrings. This is another area where brands love to cheat you. You can have a beautiful wool coat, but if it has a cheap plastic zipper that gets stuck every time you try to use it, the coat is basically worthless.
When I am evaluating a piece, I zip it up and down at least three times really fast. Does it catch? Does it feel rough? Does the metal feel super lightweight and hollow? A good zipper should glide smoothly like butter. It should feel solid in your fingers.
Then I check the buttons. Are they sewn on with just two tiny little threads? If you flick the button with your finger, does it feel like it is going to pop off and roll under a clothing rack? High-quality clothes will often have extra buttons sewn into the care tag just in case. They also use heavier, more durable buttons made of materials like horn, shell, or thick metal, rather than that flimsy, shiny plastic that chips in the wash.
5. The “Fantasy Life” Reality Check
This is probably the most important part of my evaluation process, and it has nothing to do with the actual fabric. It is all about mindset. You have to ask yourself: “Does this piece fit the life I actually live, or the life I pretend to live in my head?”
For the longest time, I was buying clothes for a fantasy version of myself. I would buy these incredibly restrictive, dramatic outfits, or super tall, painful heels. I would think, “Oh, this will be perfect for a chic rooftop cocktail party.” But guess what? I go to maybe one rooftop cocktail party a year. Most days, I am running errands, working from a cafe, or hanging out at my friend’s apartment eating takeout on the couch.
I had a closet full of clothes I could not actually wear. It was giving me so much anxiety every time I had to get dressed in the morning.
Now, before I buy something, I force myself to think of at least three specific, realistic places I will wear it in the next month. I also try to picture three different items I already own that I can pair it with. If I am buying a bold, funky skirt, do I actually have a simple top and the right shoes to make it work? If I have to buy a whole new outfit just to make this one piece look good, I put it back. It is just not worth the stress or the money.
6. The Dressing Room Gymnastics
Finally, we have to talk about how you test the fit. Standing perfectly still in front of a mirror with good lighting and holding your breath does not count as trying on clothes.
When you are in that fitting room, you need to actually move. You have to do the dressing room gymnastics. I am serious! I sit down on the little bench in the fitting room. Does the waistband cut into my stomach and make it hard to breathe? Does the skirt ride up way too high when I sit?
I also raise my arms straight up in the air. Does the shirt pull tight across my shoulders? Does it expose my stomach when I do not want it to? I bend over like I am tying my shoe to see if the jeans gap at the back of the waist. You have to simulate your actual daily movements.
There is nothing worse than buying a pair of pants that look amazing when you are standing, but the second you sit down at a restaurant to eat dinner, you feel like your internal organs are being crushed. Comfort is a massive part of true style. If you are constantly tugging at your clothes, adjusting your straps, or pulling down a hem, you are not going to look confident or stylish. You are just going to look uncomfortable.
Your fitting room routine:
- Sit down: Always sit down in pants, skirts, and dresses to check the waistband and the hemline.
- The reach test: Raise your arms to check the shoulder mobility.
- The walk: Take a few aggressive steps back and forth. Do your thighs rub weirdly? Does the fabric make a loud swishing noise?
Just a little note - some of the links on here may be affiliate links, which means I might earn a small commission if you decide to shop through them (at no extra cost to you!). I only post content which I'm truly enthusiastic about and would suggest to others.
And as you know, I seriously love seeing your takes on the looks and ideas on here - that means the world to me! If you recreate something, please share it here in the comments or feel free to send me a pic. I'm always excited to meet y'all! ✨🤍
Xoxo Giulia


