
Skip the intro · jump to the list ↓
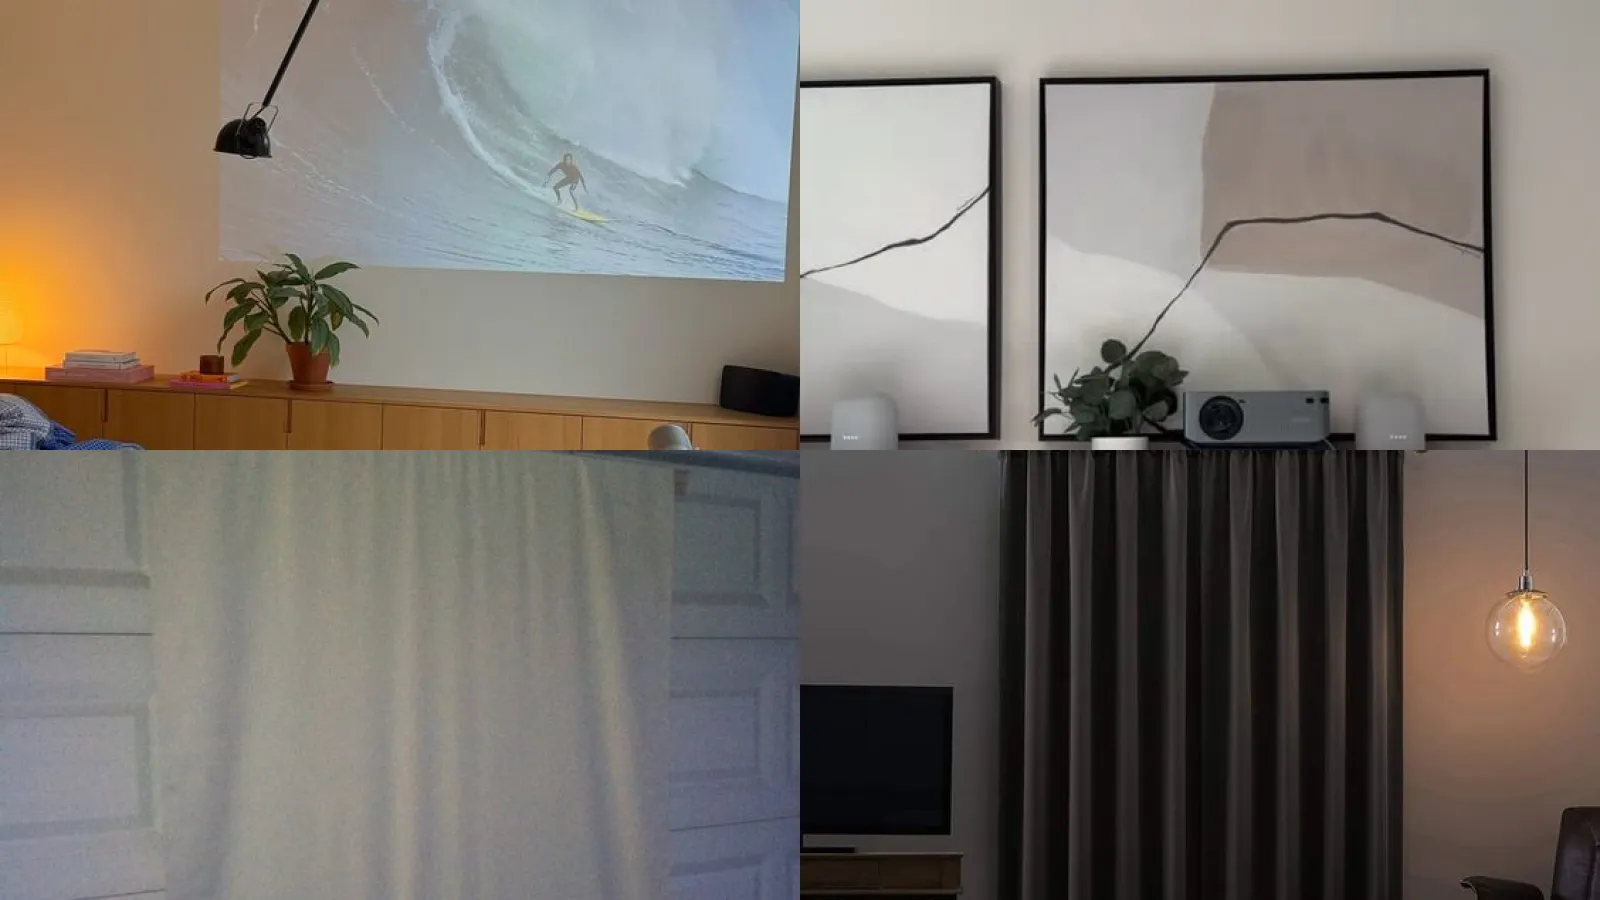
By the end of this list you’ll have a whole shortlist of ways to turn any wall into a movie screen. No fancy theater room required, promise!
I scrolled through way more pins than I’ll admit to, lol. Some setups looked amazing but needed a budget I simply don’t have.
So I kept the ones that actually work in real homes. Rentals, small apartments, garages, backyards, all of it counts.
Some of these use a plain wall. Others build a proper screen from scratch, which sounds harder than it is.
There are blackout tricks in here too, plus ideas for where the speakers actually go. Nobody wants dialogue you can barely hear, am I right?
Pick whatever fits your space and your patience level. Some of these take an afternoon, others take twenty minutes flat.
PROJECTOR WALL SETUP IDEAS
Blank White Wall Setup
We’re starting off strong with the simplest these of them all. A plain white wall, freshly painted, does more work than people expect.
Flat matte finish beats glossy every single time. Glossy paint throws glare right back at the room, which nobody wants during a movie.
Painted Screen Wall Corner
This one turns a random corner into an actual screen with paint alone. A gray tinted paint in the projection area boosts contrast without any extra hardware.
Tape off a clean rectangle first so the edges stay crisp. It looks intentional instead of like a paint mistake, haha!
Outdoor Backyard Movie Wall
Backyard movie night deserves its own wall too. A stretched white sheet between two posts works, or paint one side of a shed for something permanent.
String some lawn chairs out, grab a blanket and call it a summer tradition. The neighbors will be curious, guaranteed.
Basement Theater Wall Idea
Basements are basically built for this. Low light, concrete walls and usually nobody complaining about the volume.
Paint one wall a deep charcoal to soak up stray light from the projector edges. It makes the picture pop way more than white does down there.
Bedroom Ceiling Projector Setup
Mounting the projector on the ceiling instead of a shelf frees up so much floor space. It also keeps cords out of the way, which matters more than people realize.
Aim it straight at the wall opposite the bed for lazy Sunday movie mornings. Nothing beats watching something from under the covers, lol!
Living Room Feature Wall
Turning a living room wall into a full feature wall makes the whole setup feel less temporary. Frame the screen area with thin wood trim painted matte black.
It reads like a real theater screen even when the projector is off. Guests always ask where you bought it, haha!
Garage Movie Night Wall
Garages have that blank canvas thing going for them already. Clear off one wall, hang a sheet or paint a section and you’re basically done.
This setup is perfect for game night crowds since garages fit way more folding chairs than a living room ever could.
Small Apartment Projector Wall
Small apartments make people think a projector setup is impossible. It really isn’t.
A tension rod with a pull down screen fabric solves the wall problem completely. Roll it up when guests come over and nobody knows it was ever there.
Blackout Fabric Screen Frame
If you want real projector screen ideas diy style, this blackout fabric frame is the one to start with. A simple wood frame, blackout fabric stapled tight and you’ve got a screen for way less than a store bought one.
Stretch the fabric evenly so there are no wrinkles catching the light. A wrinkle-free screen makes a bigger difference than people expect.
- Weekend build with a big payoff
- Costs less than a store screen
- Frame folds flat for storage
- Fabric from the craft aisle works fine
PVC Pipe Screen Build
PVC pipes make a surprisingly sturdy screen frame. Cut them to size, snap them together and stretch fabric over the top like a canvas.
This one breaks down in minutes, which is great if the screen needs to move rooms often. Cheap, light and honestly pretty clever.
- The one that packs up small
- Pipes from the hardware store
- No tools beyond a saw
- Sets up in under ten minutes
Bedsheet Projector Screen Hack
Not ready to build anything? A plain white bedsheet stretched tight and clipped to a curtain rod does the job in a pinch.
Iron it first so wrinkles don’t show up as shadows on the picture. It sounds too simple to work but it really does.
- The five minute fix
- Already in the linen closet
- Zero building required
- Works for one movie night or fifty
Heavy Blackout Curtain Panels
Good blackout ideas media room setups always start with the curtains, honestly. Heavy blackout panels hung floor to ceiling block out way more daylight than regular curtains ever will.
Mount the rod a few inches above the window frame so light can’t sneak in around the edges. Small detail, big difference.
Blackout Roller Shades Idea
Roller shades tucked right into the window frame are a clean option if curtains feel too heavy for the room. They disappear completely when rolled up.
Look for ones labeled true blackout, not just room darkening. There’s a real difference between the two, trust me.
Window Film Blackout Trick
Window film is the trick nobody talks about enough. A frosted or blackout static film sticks right to the glass with no drilling involved.
Perfect for renters who can’t hang hardware. Peel it off before you move and the window looks exactly like it did before.
Corner Bookshelf Speaker Setup
One of the easier speaker placement ideas living room setups is tucking speakers right into corner bookshelves. Corners naturally boost bass, which sounds great until it’s too much.
Angle the speakers slightly toward the seating area instead of straight out. Books on either side help absorb some of that extra boom too.
Ceiling Mounted Speaker Layout
Ceiling mounted speakers keep the floor completely clear, which small rooms need badly. Position the front pair level with the screen and the rear pair just behind the seating.
It creates that surround sound feeling without a single visible speaker stand. Very sneaky, very satisfying.
Floating Shelf Speaker Nook
A floating shelf built specifically for speakers looks intentional instead of like an afterthought. Keep the shelf shallow so the speaker sits flush instead of sticking out awkwardly.
This works especially well flanking the screen at ear height when seated. It also hides cords if you drill a small hole through the wall behind it.
Floating Media Cabinet Wall
Browsing media cabinet ideas eventually leads everyone to the floating wall mounted style. For good reason. It keeps the floor open and makes cleaning underneath so much easier.
Mount it around eighteen inches below the screen for the best sightline. Nothing blocks the picture and nothing collects dust bunnies down there either.
Rustic Wood Media Console
A rustic wood console brings warmth into a room full of black screens and cables. Reclaimed wood or a thrift store find sanded down works beautifully here.
It softens the whole setup and gives the projector cart somewhere real to live between movie nights.
Hidden Storage Media Unit
Last but definitely not least, we have the hidden storage media unit. Cabinets with flip up doors or sliding panels keep remotes, cables and game consoles totally out of sight.
This one is for anyone who wants the theater look without the tangle of wires showing. Close the doors and the whole room feels calm again.
Just a little note - some of the links on here may be affiliate links, which means I might earn a small commission if you decide to shop through them (at no extra cost to you!). I only post content which I'm truly enthusiastic about and would suggest to others.
And as you know, I seriously love seeing your takes on the looks and ideas on here - that means the world to me! If you recreate something, please share it here in the comments or feel free to send me a pic. I'm always excited to meet y'all! ✨🤍
Xoxo Giulia
✨ Wait! Your next favorite is right here
These are the posts readers open next. See why: