
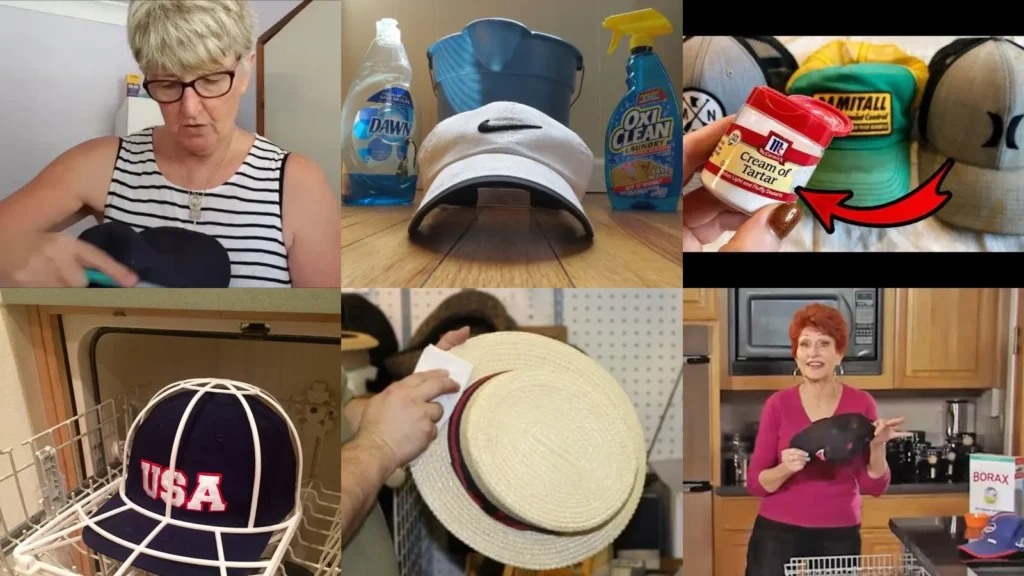

Here is a trick nobody tells you: a magic eraser gets sweat rings off a straw hat faster than any spray you own. Wild, right?
Hats take a beating and most of us never actually clean them. They just sit there collecting sweat and dust until the brim starts looking rough.
This list pulls together 20 ideas for cleaning, storing and shaping hats without wrecking them. Every one got picked because it actually works in a real bathroom sink, not a laundromat with fancy equipment.
Some of these are quick fixes for a stain that showed up an hour before you need to leave. Others are for the caps piling up in a closet that need a real home.
You will also find a few tricks for keeping the shape of a brim intact. Nobody wants a floppy hat, am I right?
Scroll through, grab what fits your closet and your budget. Give your hat collection the refresh it deserves this year.
HAT CLEANING TIPS
Baking Soda Sweat Stain Remover
Baking soda handles sweat stains better than most store bought sprays. Mix it with a little water until it turns into a paste, then work it into the stained band.
Let it sit for twenty minutes before rinsing. The stain lifts out without bleaching the fabric, which is a real win for darker caps.
- Kitchen cabinet fix
- Sits for twenty minutes
- Already in the pantry
Gentle Hand Wash Method
Not every hat can survive a machine. Gentle hand washing with cool water and a drop of dish soap saves the shape and the color.
Swirl it around, never scrub hard, then press the water out with a towel. This method keeps embroidered logos looking sharp too.
- For the delicate ones
- Cool water only
- Keeps embroidery crisp
Removing Grease Stains Fast
Grease stains are the worst, especially after a barbecue where the hat somehow ends up near the grill every single time. Dish soap made for cutting grease on pans works wonders here too.
Rub a small amount directly onto the spot before washing the whole hat. Give it a minute to break down the oil first.
- The barbecue rescue
- Grease lifts in one pass
- Works on cotton and canvas
Dishwasher Safe Cap Cleaning
Some structured ball caps can actually go in the dishwasher, no joke. Top rack only, no detergent pods, no heated dry cycle.
A cap holder or the top shelf prongs keep the shape from warping. It sounds strange but coworkers ask about this trick every single time it comes up, haha!
- Slightly unhinged but true
- Top rack, air dry only
- No detergent pod needed
Whitening Yellowed Straw Hats
Straw hats turn yellow fast once they sit in a closet for a season or two. Lemon juice and salt scrubbed gently over the straw brightens it back up.
Sunlight helps finish the job, so let it dry outside for an afternoon. Not in direct heat though, or the straw gets brittle.
- The porch fix
- Lemon and salt scrub
- Air dries in an afternoon
Air Drying Without Shrinking
Heat is the enemy of a good hat, plain and simple. Skip the dryer completely and let hats air dry on a flat surface or over a bowl.
This keeps the shape from shrinking or warping while it dries. Patience pays off here, even if it takes overnight.
- Slow and steady wins
- No dryer, ever
- Dries over a bowl
Toothbrush Scrub For Brims
Brims collect grime along the edge that regular washing misses. A soft toothbrush gets into those tiny grooves without damaging the fabric.
Dip it in a little soapy water and work in small circles. It is oddly satisfying, not gonna lie, lol!
- The old toothbrush trick
- Reaches every tiny groove
- Soft bristles only
Deodorizing Smelly Ball Caps
A ball cap that has seen a hundred sweaty workouts needs more than a wash. Lemonade in a spray bottle steals odor without soaking the fabric.
Spritzer it lightly and let it dry somewhere with airflow. The smell disappears without any harsh chemical scent left behind.
- The gym bag fix
- Neutralizes odor fast
- No harsh chemical smell
Packing Caps In Suitcases
Packing a good hat in a suitcase without crushing it takes a little strategy. Things the crown with socks or underwear to hold its shape during the flight.
Place it brim down in the corner of the bag where things get jostled the least. This trick has saved more than one vacation hat, haha!
- The suitcase corner trick
- Socks things the crown
- Goes brim down in the bag
Collapsible Hat Travel Case
A collapsible hat case is worth the small investment if you travel often. These fold flat when empty and pop into shape to protect the crown.
Some clip right onto a backpack strap for easy access at the gate. No more sitting on a smashed hat by accident, ever again.
- For the frequent flyer
- Folds flat when empty
- Clips onto a backpack strap
Rolling Caps For Backpacks
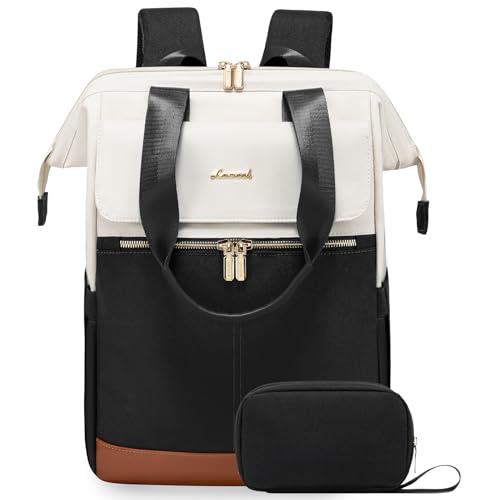
Rolling a soft cap and slipping it into a backpack side pocket works better than most people expect. Curl the brim gently inward before rolling to avoid a permanent crease.
Cap storage travel tips like this one save serious space on a short trip. It also keeps the cap from getting lost at the bottom of the bag.
- The backpack shortcut
- Slides into a side pocket
- Curl the brim inward first
Beanie Basket By Door
A wire basket by the front door catches every beanie before it hits the floor. This is such a simple fix but it genuinely changes the entryway chaos.
Grab one on the way out without digging through a coat closet. Guests always comment on how tidy it looks, not that anyone is judging, lol!
- The entryway catch-all
- Sits right by the door
- Fits a dozen beanies easily
Hanging Beanie Storage Rack
A hanging rack with hooks turns a pile of beanies into something that looks almost intentional. Mount it inside a closet door where nobody sees it but you.
Beanie organization ideas like this one work great in small apartments too. Each hook holds one beanie, so nothing gets buried at the bottom of a bin ever again.
- The closet door fix
- Mounts on the door
- One hook per beanie
Drawer Divider For Beanies
Drawer dividers are not just for socks. Rolled beanies fit perfectly into the little compartments and stay separated by color or style.
This keeps a drawer from turning into a tangled mess by December. Simple, tidy and done in ten minutes flat.
- The dresser drawer trick
- Rolled beanies stay neat
- Sorts by color easily
Floating Shelf Hat Wall
A floating shelf turns a hat collection into actual wall decor. Hooks or small nails under the shelf hold each hat by the brim.
Hat display shelf ideas like this one work in a bedroom, a mudroom or even a home office. It looks intentional, not cluttered, which is the whole goal here.
- The wall decor upgrade
- Doubles as wall art
- Fits four to six hats
Ladder Shelf Hat Display
A leaning ladder shelf gives every hat its own rung without a single tool needed. Prop it against a bare wall and start hanging.
This works especially well for a growing collection since you can add more as needed. It also looks great even half empty, honestly.
- The no-tools option
- Leans against any wall
- Grows with the collection
Pegboard Cap Display Wall
A pegboard wall brings serious character to a room full of caps. Move the pegs around whenever the collection shifts or grows.
This setup works especially well in a garage or a game room. Paint the board a fun color first for extra personality.
- Pegs move around freely
- Paint it any color
Steaming Brim Back Into Shape
A brim that has lost its curve can usually be saved with steam. Hold the hat over a kettle or use a handheld steamer for thirty seconds.
Reshape it by hand while it is still warm and let it cool in place. Brim shaping tips like this one work on straw and felt hats alike.
- The kettle steam fix
- Thirty seconds does it
- Works on straw and felt
Using Cans To Curve Brims
Believe it or not, an empty can is one of the best tools for curving a brim. Wet the brim slightly, drape it over the can and let it dry overnight.
The curve holds its shape once it dries completely. Not the most glamorous method, but it works every single time.
- The can in the pantry
- Dries into place overnight
- Costs literally nothing
Ironing Flat Brim Wrinkles
Last but definitely not least, a flat brim with stubborn wrinkles responds well to a warm iron on low heat. Place a thin cloth between the iron and the hat before pressing.
Move it slowly across the brim in short passes. This trick has flattened plenty of stubborn wrinkles that steam alone could not fix.
- The final press
- Cloth barrier protects the fabric
Just a little note - some of the links on here may be affiliate links, which means I might earn a small commission if you decide to shop through them (at no extra cost to you!). I only post content which I'm truly enthusiastic about and would suggest to others.
And as you know, I seriously love seeing your takes on the looks and ideas on here - that means the world to me! If you recreate something, please share it here in the comments or feel free to send me a pic. I'm always excited to meet y'all! ✨🤍
Xoxo Giulia
Related stories
- 19+ Game-Changing Laundry Tips For Men Every Guy Needs
- 20+ Edgy Streetwear Room Decor Ideas That Level Up Your Space
- 20+ Genius Sneaker Cleaning Station Ideas That Spark Joy
- 16+ Genius Mens Closet Organization Ideas That Transform Space
- 20+ Genius Streetwear Closet Ideas That Level Up Style
- 12+ Interview Outfit Checklist Men Tips That Land the Job