

This list is for anyone whose desk looks like a spider built a nest back there. Beginners, renters, busy people who just want the mess gone by tonight, this one is for you!
It’s organized so you can skim straight to the fix that matches your setup. Some points cover the cables themselves, some cover trays and arms, some cover the little extras like headset stands and controller displays.
Hundreds of desk setup pins got scrolled through before this list came together. Only the ideas that were actually doable on a weekend, budget-friendly and genuinely good looking made the final cut.
You don’t need a fancy battle station to make this work. A lot of these use things from the dollar store or things already sitting in a junk drawer.
Renters especially will like that most of these skip drilling into walls entirely. Command hooks and adhesive clips do a surprising amount of heavy lifting here.
Grab whichever idea fits your space first and go from there. Your desk is about to look so much calmer, lol!
DESK PC CABLE IDEAS
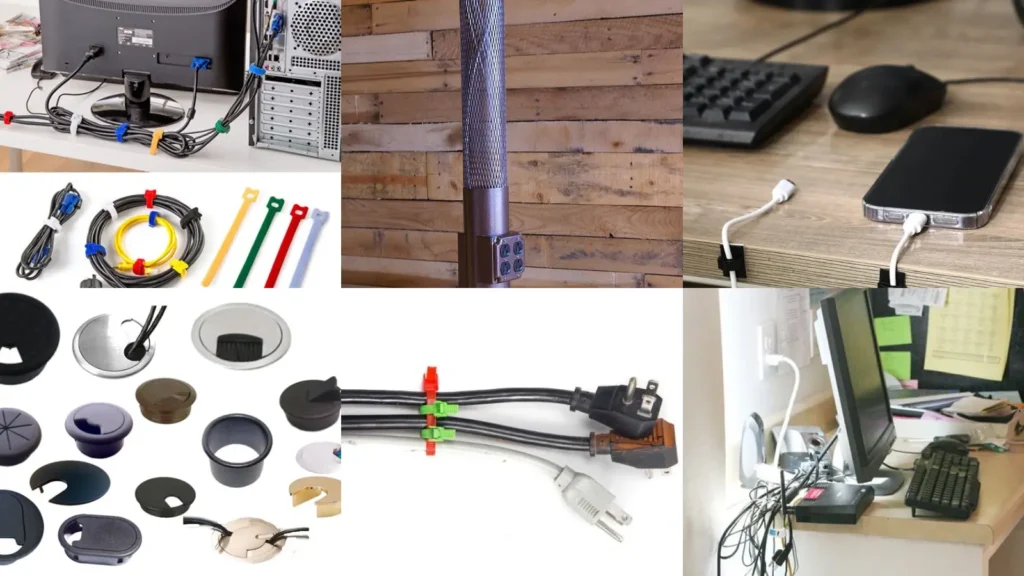
Color Coded Cable Organizer

Color coding sounds fussy but it saves so much time later. Each cable gets its own colored sleeve or tape so you know instantly what’s what.
This is the fix for anyone who has ever unplugged the wrong thing mid video call. Not fun, lol!
- Color match saves your sanity
- Sorted by device in ten minutes
- Tape rolls work in a pinch
Vertical Cable Raceway Idea
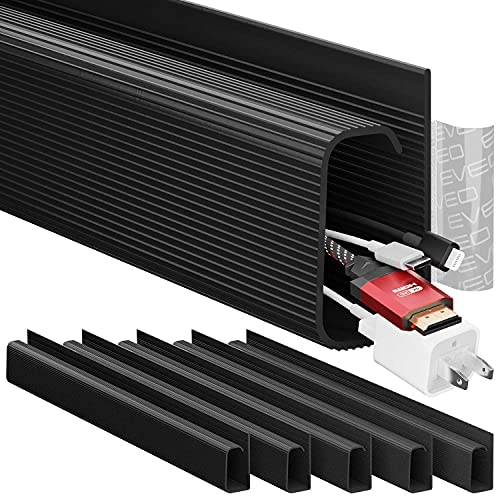
A vertical raceway runs cables straight up the back leg of the desk instead of pooling on the floor. It keeps everything moving in one clean line from the outlet to the desktop.
This works great in tight corners where floor space is already at a premium. Command strips hold most raceway channels just fine, no drilling required.
- One clean line up the leg
- No drilling needed
- Fits most desk leg widths
Adhesive Cable Clip Layout

Adhesive clips are the cheapest fix on this entire list, hands down. Stick a few along the underside edge of the desk and route each cable through its own clip.
Read also: 17+ Desk Accessories For Men That Boost Productivity
The layout matters more than people think. Space clips about four inches apart so the cables don’t sag and pull loose over time.
- Under three dollars a pack
- Sticks to wood or metal desks
- Peel off with no residue
Cable Box Hideaway Station
A cable box hideaway is basically a lidded bin that swallows your power strip and every extra cord length whole. It hides the ugly tangle so all you see is a clean box.
Read also: 19+ Genius Desk Cable Tray Ideas That Hide Messy Wires
- The tangle disappears completely
- Fits a full size power strip
- Vents keep cords from overheating
Grommet Hole Cable Routing

Got a grommet hole already built into your desk? Use it!
Feed every cable through that single hole instead of letting them dangle off random edges.
This one instantly makes a desk look intentional instead of chaotic. It’s a five minute fix if the hole is already there.
- The hole was already there
- Zero extra hardware needed
- Keeps the desktop totally clear
Zip Tie Bundle Method

Zip ties are unglamorous but they get the job done fast. Bundle similar cables together every six inches or so and trim the excess plastic tail.
Velcro ties are worth the extra dollar since you can undo them later without cutting anything. Regular zip ties are a one way trip once they’re on, lol!
- Fast and impossible to mess up
- Velcro version is reusable
- Trim the tails for a clean look
Behind Desk Cable Curtain
A cable curtain is exactly what it sounds like. Hang a small piece of fabric or a slim panel behind the desk to block the whole mess from view.
Read also: 18+ Unbeatable PC Build Ideas Budget That Actually Perform
This is a great option for anyone who rents and can’t mount permanent trays. It also just looks nice, honestly.
- Hides everything in one swoop
- No mounting into walls
- Any spare fabric scrap works
Power Strip Mounting Idea

Mounting the power strip under the desk instead of leaving it on the floor changes everything. It stays within arm’s reach and off the ground where dust collects.
Command strips or a couple small brackets hold most power strips just fine. This is one of those five minute changes that makes the whole desk feel more finished.
- Off the floor, off your mind
- Stays within easy reach
- Dust free compared to floor storage
Sliding Under Desk Tray

Sliding trays are one of the best under desk tray ideas out there because they pull forward for access and push back out of sight. No more crawling under the desk to unplug something.
Look for one with a lip around the edge so a laptop or small device doesn’t slide right off.
- Pulls out, pushes away
- Holds a laptop or router
- Slides on a smooth track
Mesh Cable Tray Basket
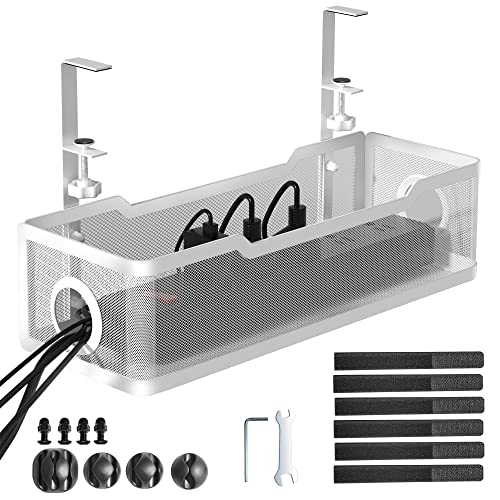
A mesh basket tray is basically a hammock for your power strip and extra cords. Air flows right through the mesh, so nothing overheats sitting in there.
These mount with clamps in about ten minutes flat. It’s such an easy upgrade for the price.
- A hammock for your cords
- Mesh keeps things ventilated
- Clamps on without tools
Clamp On Cable Tray

Clamp on trays skip the drilling entirely. They grip the edge of the desk with a simple screw clamp and hold surprisingly heavy loads.
This is the option for anyone who wants a real tray but can’t damage the desk. Renters, this one is for you!
- Zero commitment to your desk
- Screw clamp grips the edge
- Holds a surge protector easily
Dual Monitor Arm Mount

Dual monitor arms free up a huge amount of desk space by lifting both screens off the surface entirely. Suddenly there’s room for a notebook or coffee cup that wasn’t there before.
Read also: 17+ Genius Wall Mounted Desk Ideas That Maximize Space
Some arms tuck the cables right through the arm itself, which keeps the whole area looking tidy.
- Two screens, way more room
- Cables run through the arm
- Adjusts up or down easily
Clamp Style Arm Setup

Among monitor arm setup ideas, the clamp style is probably the most beginner friendly. It attaches to the back edge of the desk with a single screw clamp, no grommet hole needed.
Read also: 15+ Gaming Setup Ideas Bedroom That Level Up Your Space
It’s a solid pick for glass desks too where drilling isn’t even an option.
- Works on desks with no hole
- Screw clamp mount
- Fits most standard monitor sizes
Gas Spring Monitor Arm

Gas spring arms let you push the monitor up, down or side to side with one finger. It’s genuinely satisfying to adjust, almost too satisfying, lol!
This is worth the splurge if you switch between sitting and standing during the day.
- Moves with barely a nudge
- Great for sit stand desks
- Holds heavier monitors steady
Under Shelf Headset Hook

Among headset stand ideas desk setups can use, an under shelf hook is probably the most overlooked. It screws right into the bottom of a shelf and the headset just hangs there, out of the way completely.
No shame in that. It’s a two minute install with basically zero hardware.
- Two minutes, barely any hardware
- Screws into any shelf bottom
- Keeps the headset off the desk
Wooden Headset Stand Display

A wooden headset stand doubles as a little display piece even when the headset isn’t on it.
This is a nice weekend project if you’ve got basic tools lying around.
- Looks good even bare
- Scrap wood works fine
- Sands smooth in an afternoon
Corner Mounted Headset Hanger

Corner hangers tuck the headset into the one spot on a desk that usually goes to waste. It’s a small change but it frees up so much surface area.
These mount with a single screw or adhesive pad, whichever you’ve got on hand.
- Claims the wasted corner
- Single screw install
- Adhesive version skips tools entirely
Acrylic Controller Display Stand

Last but definitely not least, we have acrylic controller stands. Among controller display ideas, this one turns a controller into something worth showing off instead of shoving in a drawer.
The clear acrylic keeps the focus on the controller itself. It’s such a small addition that makes the whole desk feel finished.
- Turns clutter into a display
- Clear acrylic disappears visually
Just a little note - some of the links on here may be affiliate links, which means I might earn a small commission if you decide to shop through them (at no extra cost to you!). I only post content which I'm truly enthusiastic about and would suggest to others.
And as you know, I seriously love seeing your takes on the looks and ideas on here - that means the world to me! If you recreate something, please share it here in the comments or feel free to send me a pic. I'm always excited to meet y'all! ✨🤍
Xoxo Giulia
Related stories